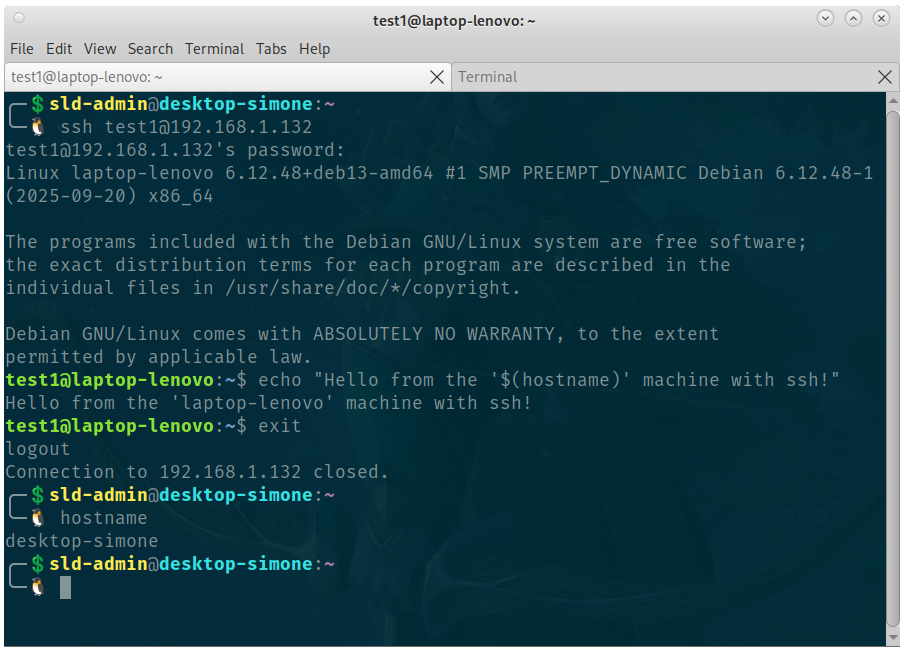
1. What is SSH and Why Use It?
SSH (Secure Shell) is the cryptographic network protocol standard for secure system administration and communication with remote Unix-like and Linux servers. Designed to replace insecure legacy protocols such as telnet, rlogin, and unencrypted FTP, SSH provides strong mutual authentication, end-to-end payload encryption, and data integrity over untrusted networks.
SSH traditionally operates over TCP port 22 and delivers four foundational capabilities:
- Interactive Remote Shell Access: Fully encrypted terminal sessions with PTY allocation.
- Automated Remote Command Execution: Fast, headless command and pipeline execution without interactive prompts.
- Encrypted File Transfers: Native subsystem protocols including SFTP and SCP.
- Network Tunneling & Port Forwarding: Creating secure conduits for local ports, remote reverse tunnels, and dynamic SOCKS5 proxies (functioning like an on-demand VPN).
2. Basic Connection & Command-Line Syntax
The standard command-line syntax for the OpenSSH client is:
ssh [options] username@remote_host
Practical Connection Examples:
# Standard connection on default port 22
ssh [email protected]

# Connecting to a custom listening port (e.g. 2222)
ssh -p 2222 [email protected]

# Direct single command execution without interactive shell
ssh [email protected] "uptime && free -h"

# Verbose debugging mode to diagnose connection issues (-v, -vv, -vvv)
ssh -v [email protected]
Upon your first connection to a remote host, the client displays the server's public key fingerprint and asks for confirmation to record it in your local ~/.ssh/known_hosts file. Type yes to proceed.
3. Public-Key Authentication (Ed25519)
Password-based authentication is susceptible to brute-force attacks. The modern industry standard relies on cryptographic key pairs: a private key stored securely on your local client and a public key installed on the server.
Step 1: Generate the Key Pair
On your local computer, execute the OpenSSH key generator specifying an identifying label:
ssh-keygen -t ed25519 -C "[email protected]"
Press Enter to accept the default file location (~/.ssh/id_ed25519) and supply a strong passphrase to encrypt the private key at rest.
Step 2: Deploy Public Key to Remote Server
Use the built-in ssh-copy-id helper to automatically append your public key to ~/.ssh/authorized_keys on the remote server:
# Standard port
ssh-copy-id -i ~/.ssh/id_ed25519.pub [email protected]

# Custom port
ssh-copy-id -p 2222 -i ~/.ssh/id_ed25519.pub [email protected]
Step 3: Enforce Correct File Permissions
OpenSSH will strictly reject keys if permissions are too loose. Set proper UNIX permissions:
# Local client machine
chmod 700 ~/.ssh
chmod 600 ~/.ssh/id_ed25519
chmod 644 ~/.ssh/id_ed25519.pub

# Remote server
chmod 700 ~/.ssh
chmod 600 ~/.ssh/authorized_keys
Step 4: Using SSH Agent (ssh-agent)
To avoid re-typing your passphrase on every connection, load your key into the active SSH agent session:
eval "$(ssh-agent -s)"
ssh-add ~/.ssh/id_ed25519
4. Client Configuration File (~/.ssh/config)
Instead of memorizing IP addresses, custom ports, usernames, and key paths, define structured connection profiles in ~/.ssh/config:
# Main Production Server
Host production-server
    HostName 198.51.100.24
    User username
    Port 2222
    IdentityFile ~/.ssh/id_ed25519
    ServerAliveInterval 60
    ServerAliveCountMax 3

# Local Homelab Node
Host homelab
    HostName 192.168.1.50
    User root
    IdentityFile ~/.ssh/id_ed25519
You can now connect simply by running:
ssh production-server
5. Port Forwarding & Tunneling
SSH tunneling encapsulates arbitrary TCP traffic inside an encrypted stream. There are three core tunneling mechanisms:
| Mode | Flag | Direction | Typical Use Case |
|---|---|---|---|
| Local Forwarding | -L [local_port]:[dest_host]:[dest_port] |
Local → Remote | Access internal databases or private web services (e.g. MySQL 3306, Cockpit 9090) without exposing them publicly. |
| Remote Forwarding | -R [remote_port]:[dest_host]:[dest_port] |
Remote → Local | Expose a local development web server to a public remote server. |
| Dynamic Forwarding | -D [local_port] |
Local → SOCKS5 Proxy | Create a dynamic local SOCKS5 proxy routing all browser or app traffic (VPN-like functionality). |
Local Port Forwarding Example:
Forward local port 8080 to port 80 on the remote server:
ssh -L 8080:localhost:80 -N [email protected]
Navigating to http://localhost:8080 in your local browser directly opens the private remote service.
6. SOCKS5 Proxy Creation with SSH & SwitchyOmega (VPN Tunnel)
One of the most powerful features of OpenSSH is Dynamic Port Forwarding (the -D flag). With a single command, SSH turns the remote server into a local SOCKS5 proxy server.
All network traffic routed to this socket is encrypted, piped through the SSH tunnel, and egresses from the remote server to the public Internet. By pairing this socket with a browser extension like Proxy SwitchyOmega, your browser adopts the public IP of the remote server and bypasses firewalls or untrusted public Wi-Fi networks — functioning exactly like a VPN without needing any server-side VPN daemons!
Step 1: Launch SOCKS5 Proxy via Terminal
Run SSH with the -D flag followed by your chosen local port (typically 1080 or 10808):
# Interactive mode with data compression (-C) and no remote shell execution (-N)
ssh -D 1080 -C -N [email protected]

# Background daemon mode (-f) with quiet output (-q):
ssh -D 1080 -f -N -C -q [email protected]
Parameter breakdown:
-D 1080: Binds a local SOCKS5 listening socket to127.0.0.1:1080.-C: Enables zlib data compression on the stream for faster web page loads.-N: Tells SSH not to execute remote commands (optimizing resources solely for tunneling).-f: Forks the SSH process into the background immediately after authentication.
Permanent Profile in ~/.ssh/config:
Add a dedicated entry in your client configuration to launch the tunnel with a single word:
Host vpn-tunnel
    HostName server.domain.com
    User username
    Port 22
    DynamicForward 1080
    ServerAliveInterval 30
    ServerAliveCountMax 3
    IdentityFile ~/.ssh/id_ed25519
Start the tunnel at any time with:
ssh -N vpn-tunnel
Step 2: Configure Proxy SwitchyOmega Extension
Proxy SwitchyOmega is a top-tier proxy management extension for Chromium-based browsers (Chrome, Brave, Edge) and Mozilla Firefox.
- Install Proxy SwitchyOmega from your browser's official extension store.
- Click the extension icon in the toolbar and select "Options".
- In the left sidebar, click "+ New profile".
- Name your profile (e.g.
SSH-VPN-Tunnel), select "Proxy Profile", and click "Create". - In the proxy server settings table:
- Scheme / Protocol: Choose
SOCKS5from the dropdown. - Server: Enter
127.0.0.1(orlocalhost). - Port: Enter
1080(matching your-Dargument).
- Scheme / Protocol: Choose
- Click the green "Apply changes" button on the left sidebar to save.
Step 3: Activate the Profile and Verify Connection
- Click the SwitchyOmega icon in your browser toolbar.
- Select the
SSH-VPN-Tunnelprofile (the icon badge will reflect the profile color). - Visit an IP checking utility like https://ifconfig.me or https://ipinfo.io: your reported public IP will match your remote server!
- To disconnect, select
[Direct]in SwitchyOmega and terminate the background SSH process (killall sshor pressingCtrl + Cin your terminal).
Step 4: Smart Routing with "Auto Switch" Rules
SwitchyOmega allows creating an "Auto Switch" profile: your browser uses your normal direct connection by default, but automatically routes specific domain patterns (e.g. *.internal.lan, *.domain.com, or corporate subnets) through your SSH SOCKS5 tunnel.
7. Secure File Transfers (SCP, SFTP & Rsync)
OpenSSH incorporates high-performance tools for transferring and syncing files:
Using SCP (Secure Copy):
# Copy a local archive to the remote server
scp backup.tar.gz [email protected]:/var/backups/

# Recursively download a remote directory to local storage
scp -r [email protected]:/var/www/html/ ./local_backup/
Using Rsync over SSH (Recommended for Large Datasets):
# Fast incremental synchronization with progress and compression
rsync -avzh --progress -e "ssh -p 22" ./projects/ [email protected]:/home/username/projects/
8. Multi-Hop Jump Hosts (ProxyJump)
In enterprise networks and cloud VPCs, private nodes lack public IP addresses and must be reached through an edge bastion gateway (Jump Host).
Connect across the bastion in one step with the -J flag:
ssh -J [email protected]:22 [email protected]
Or configure it permanently in ~/.ssh/config:
Host bastion
    HostName bastion.domain.com
    User bastion_user

Host internal-node-1
    HostName 10.0.0.45
    User internal_user
    ProxyJump bastion
Running ssh internal-node-1 now routes the connection seamlessly through the bastion host.
9. OpenSSH Server Hardening (/etc/ssh/sshd_config)
To protect your Linux server against unauthorized automated scans and brute-force attempts, configure the server daemon configuration file /etc/ssh/sshd_config:
# 1. Disable password authentication (mandates cryptographic keys)
PasswordAuthentication no
ChallengeResponseAuthentication no

# 2. Disable root login over password
PermitRootLogin prohibit-password

# 3. Change default listening port to eliminate generic bot scans
Port 2222

# 4. Restrict allowed login accounts
AllowUsers username admin

# 5. Limit authentication attempts and grace time
MaxAuthTries 3
LoginGraceTime 30

# 6. Disable unneeded X11 forwarding
X11Forwarding no
PermitEmptyPasswords no
sudo sshd -t prior to restarting the service to avoid locking yourself out!Apply changes by reloading the service:
sudo sshd -t
sudo systemctl reload ssh   # Debian / Ubuntu
# or: sudo systemctl reload sshd   # RHEL / Fedora / Arch
10. Troubleshooting & FAQ
1. Error: Host key verification failed / REMOTE HOST IDENTIFICATION HAS CHANGED
Occurs when the remote server is reinstalled and generated new host keys. To update your local record:
ssh-keygen -R 192.168.1.10
2. Error: Permission denied (publickey)
Verify that your public key is added to ~/.ssh/authorized_keys on the server and check directory permissions:
chmod 700 ~/.ssh
chmod 600 ~/.ssh/authorized_keys
3. Error: bind: Address already in use When Opening SOCKS5 Socket
Indicates another process is already listening on port 1080. Identify and terminate it:
# Find active process on port 1080
lsof -i :1080

# Kill process listening on port 1080
fuser -k 1080/tcp
11. Summary & Conclusion
SSH is far more than a simple remote shell: it is a comprehensive network encryption toolkit capable of securing file syncs, traversing multi-hop bastion topologies, and providing on-demand encrypted web browsing through SOCKS5 Dynamic Forwarding paired with SwitchyOmega.
By deploying Ed25519 keys, structuring ~/.ssh/config profiles, and hardening sshd_config, you ensure an impenetrable, lightning-fast remote administration environment.